
| 9. Measuring - Cross-staff or Jacob’s Staff |
|
| image credit: Canadian Museum of History |
Here is this activity as published on the Astronomical League observing program page:
"An astrolabe or quadrant is good when measuring a single object. It is possible to measure the difference between things but it requires two readings, one for each object. A cross-staff is designed to measure two things simultaneously.
It is a bit hard to locate directions and information on a cross-staff so
try your hand at the one described at:
https://www-spof.gsfc.nasa.gov/stargaze/Scrostaf.htm
Try using a cross-staff to measure the angle between:
You were standing on the ground when you used all three of the constructed instruments. Navigation at sea was a major concern during the time period these instruments were used. Finding the latitude was a daily chore. Imagine trying to do that on a moving sailing ship."
ASSEMBLY
Please note: What follows is NOT a step-by-step how-to set of instructions, but a photo illustrated account of the thought processes I went through while reverse-engineering this instrument from images. Should you decide to construct your own cross staff, feel free to use any of my ideas and to contact me if you have questions.
The NASA link very nicely explains the principle of the cross-staff and steps you through the math involved. It's been over half a century since I took high school trigonometry, but it came back to me. The only difference is that back then every self respecting math textbook had a set of trig tables in the back. An then there was the old "slipstick"...slide rule. Now the calculator on my antiquated flip-phone even does trig functions.
The link also describes how to construct a simple cross staff using a yard stick, card stock, glue and rubber bands. I used the yardstick idea for starters, then let my imagination fly.
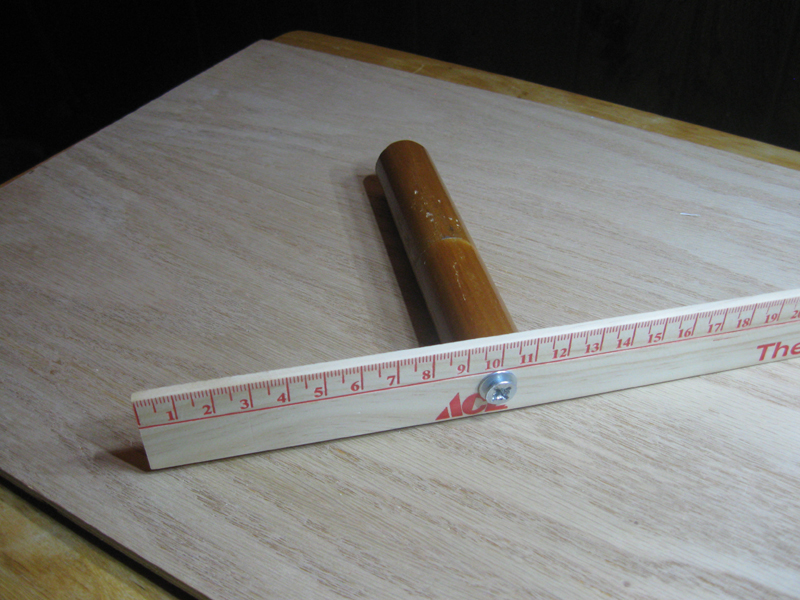
I picked up a couple of yardsticks at my local Ace Hardware franchise store. 36 Imperial inches printed on one side, 91.5 centimeters on the flip side. $1.49 each.
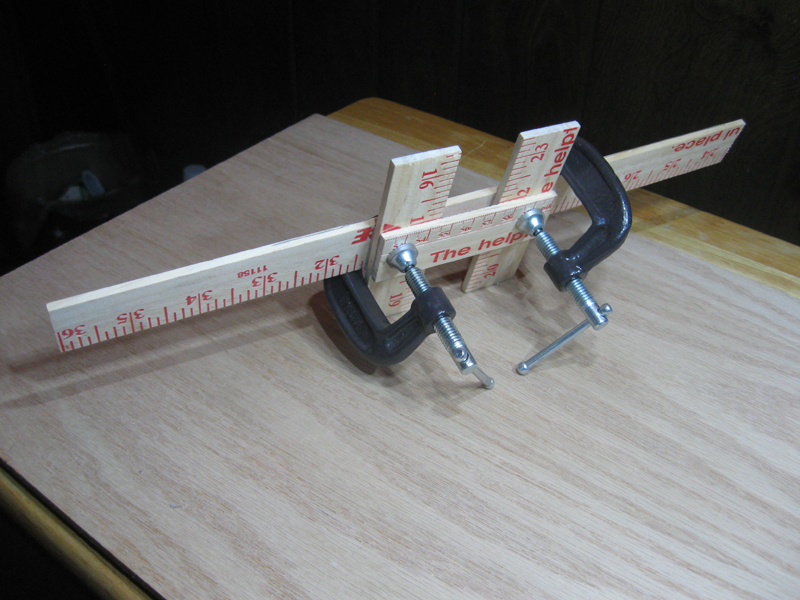
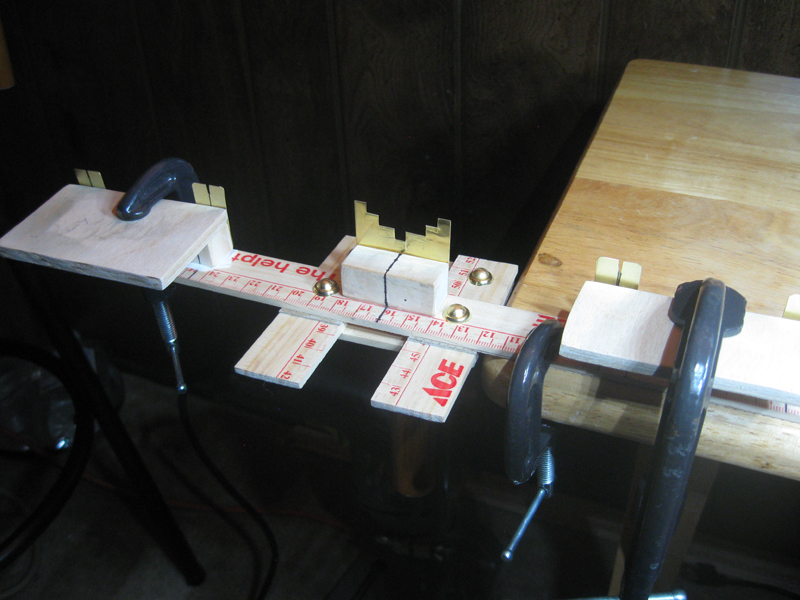
I sacrificed one of the sticks by cutting it up into pieces to construct the cross piece. The staff stick slides through a cage. I squared things up with a carpenters square, then glued and clamped the slide cage together. If you're trying this, make sure you remove the staff from the cage while the glue sets or it may get glued in place.
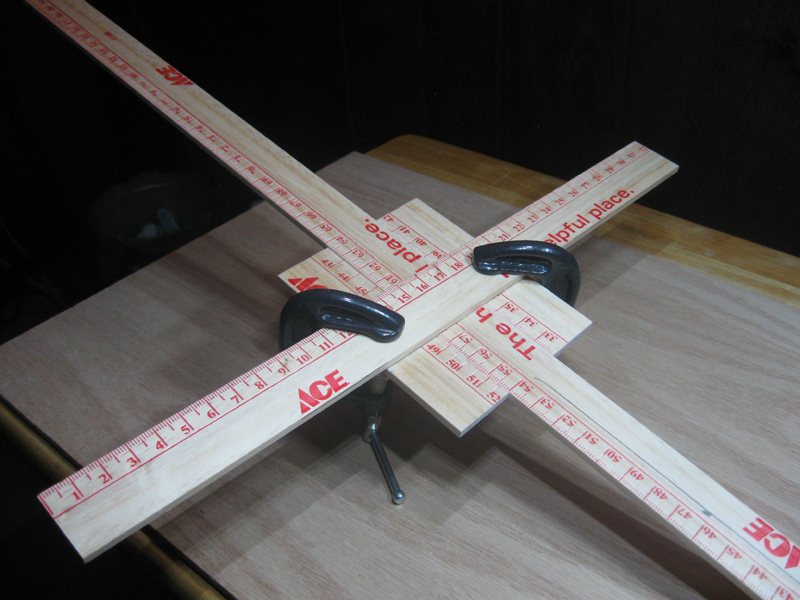
Cut the cross piece and slider cage from the second yardstick. Fit before glueing! The staff should slide fairly freely within the cage, but with no excessive play.
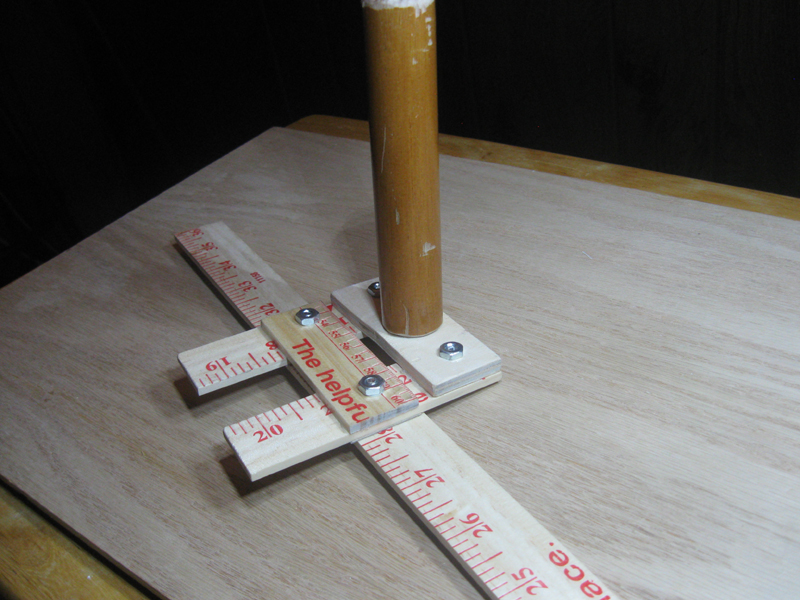
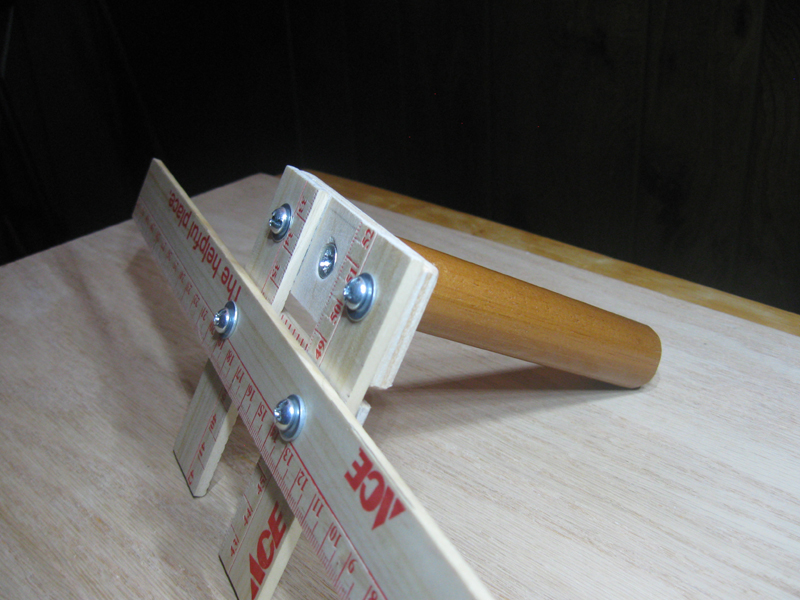
I reinforced the cage with machine screws and hex nuts. I used a little scrap piece of 1/4" plywood as a connecting plate for the foreward handle. I could have used yardstick wood, but plywood is a little stronger. The handles were cut from an old broomstick.
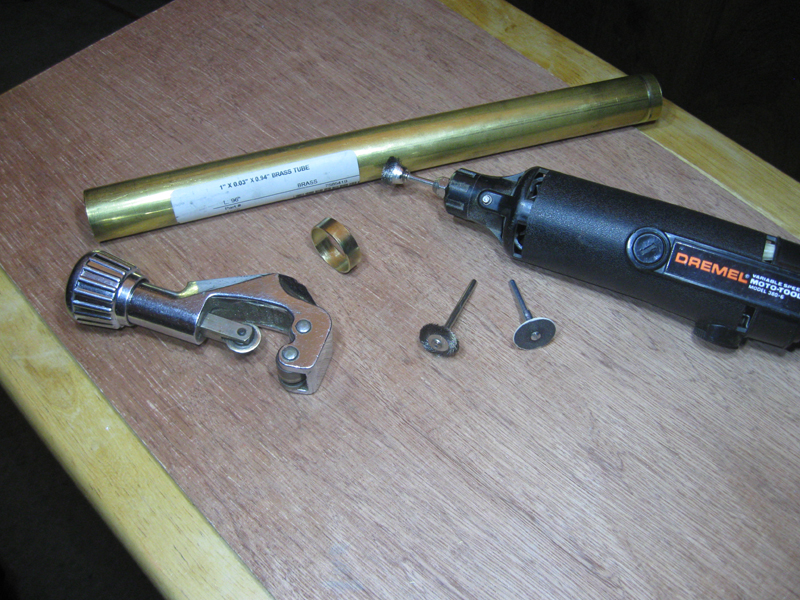
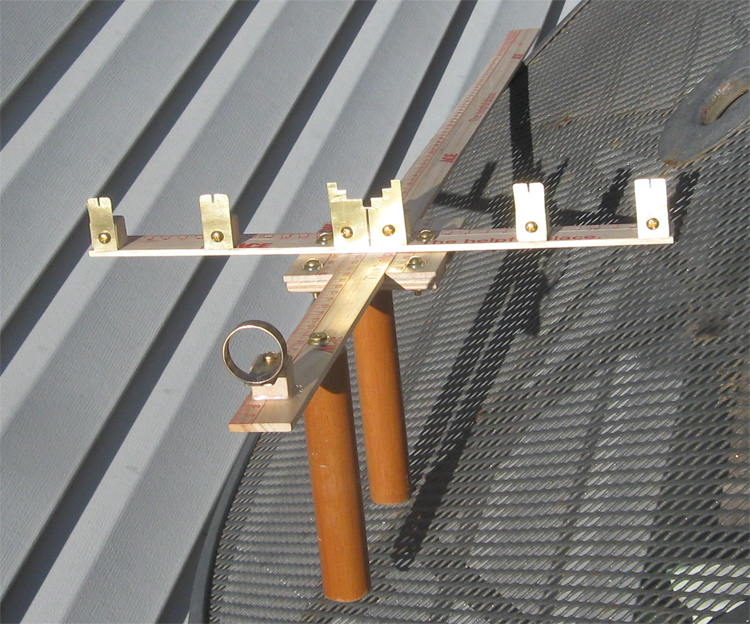
I cut the sights out from .010" sheet brass (K&S #251) that I had in my parts bin. This thickness of brass can be cut with scissors The slits in the outer sights were cut with a Dremel tool using a cutoff wheel. This made a nice smooth slit about 1 mm wide. I didn't want to glue the brass sights directly to the wood, so I cut little wood cubes (15 mm square) from a square dowel rod. I marked alignment guides on the cubes and screwed on the brass sights.
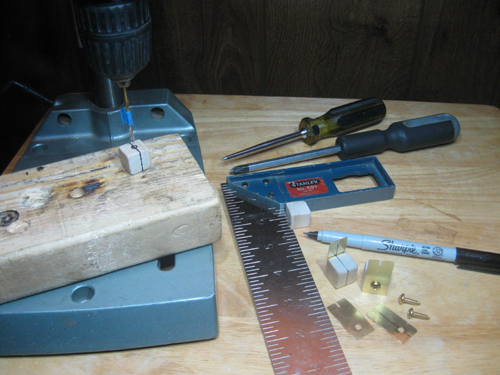
The blocks were then glued to the cross piece, aligned with the markings I made there. The brass sight plates align with the far edge of the cross piece.
You may have noticed that I replaced the nickel plate hardware with brass. Only cost me a few pennies more, but everything matches now. And we wouldn't want dissimilar metals to invite galvanic corrosion if we go to sea.
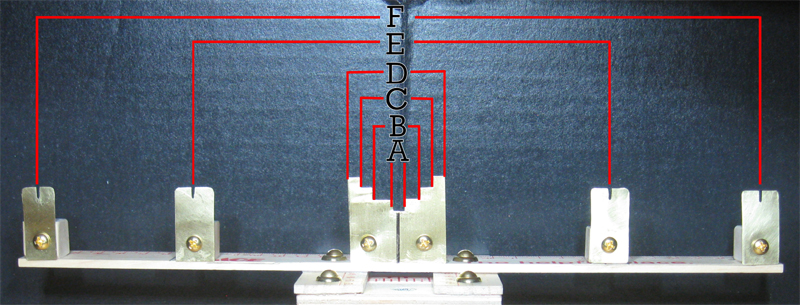
I calculated the scales before I started construction. I wanted the narrowest (A) scale small enough to measure the diameter of the Moon, and the (F) scale wide enough to measure a 90 degree angle. The intermediate scales are spaced so that there are overlapping ranges from 0.35 to 90 degrees.
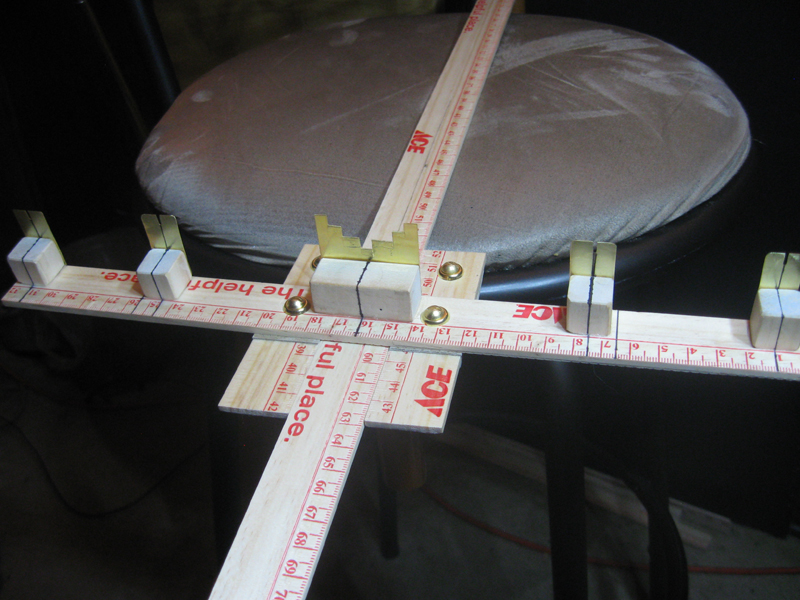
A second handle is attached to the staff.
I looked at a lot of cross staff and Jacob's staff images in Google searches. What struck me is that the end you look through is invariably just a stick. Putting long sticks up to my eye in the dark makes me just a bit nervous. And I wonder if you can get consistent readings randomly poking a stick in your face.
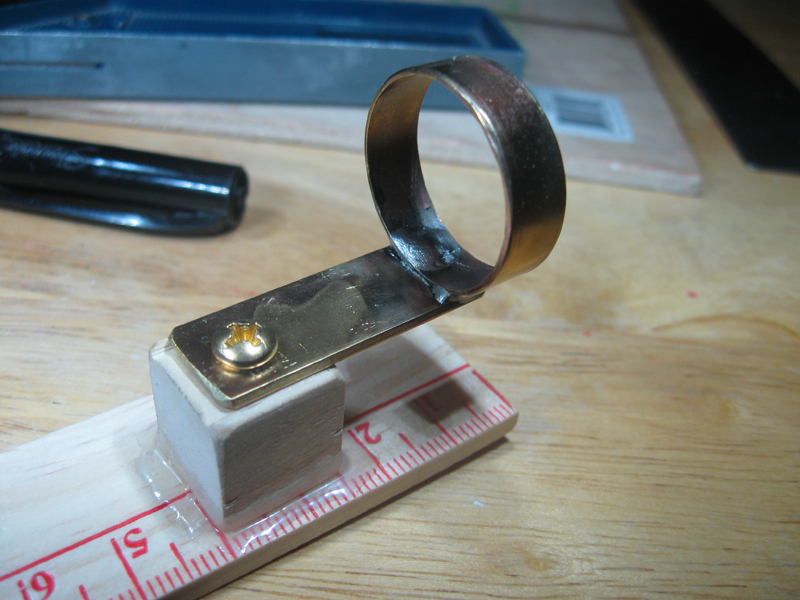
My solution is to put an oculus on the end of the stick. No optics, just a ring to provide a support for consistent eye placement. I just screw my eye into it like a telescope eyepiece with minimal eye relief, my eye is in the same spot every time I take a reading.
I cut the oculus ring out of a length of 1-1/4" brass tubing and polished it up.
I soldered the ring to a brass tab screwed it to a wooden block, then glued the whole affair to the end of the staff. The rear edge of the ring is aligned to the zero mark on the staff scale. The center of the ring (your pupil) is at the same height above the staff as the notches in the sights, minimizing a vertical error factor.
A couple coats of clear sealant and a light sanding, and here's the whole thing assembled.
A little postscript here after some field trials: DESIGN FAIL! From the Back to the Drawing Board Division of the Department of It Looked Good on Paper: Works great under twilight conditions. Under dark sky conditions the red printed scale is impossible to read with a red LED flashlight. These flashlights are tools of the trade for amateur astronomers. They're great for preserving night vision but totally useless for trying to read anything printed in red. I did all of the observations trying to make readings with a regular flashlight without disturbing my fellow observers. I'm already on the lookout for different meter sticks with nice black printing.
The function of the instrument is to measure an angle between two points. The observer looks through the ocular and lines up the two points with one of the six (A-F) scales. Slide the cross bar up and down the staff until the points line up perfectly with a pair of slits or notches on the scales, then read off the number where the staff and crosspiece intersect.
With this measurment and the width of the scale used, the unknown angle can be calculated.
The sight scales were designed to be the following dimensions:
A=2.5 mm B=10 mm C=15 mm
D=20 mm E=85 mm F=150 mm
Because I'm human, after construction I used a caliper to measure the actual dimensions. They are:
A=2.15mm B=9.95 mm C=15.25 mm D=19.95 mm E=86 mm
F=150.2 mm
I use the corrected values in all subsequent calculations.
The formula for calculating half the angle where BC is the width of the scale used and AC is the reading from the staff:
Tan A=BC/AC
A=Arctan (BC/AC)
Multiply this result x2 and you have the observed angle. Observations can be made and recorded in the field and do the number crunching at home. It's pretty easy with any device that has scientific calculator emulator.
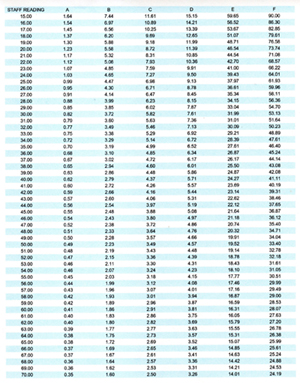
For quick estimates I developed a spreadsheet with the full range of possible staff readings plotted against the six scale ranges. Here's a picture of my 'cheat-sheet' for the field. I used the corrected 'as constructed' scale widths, so this spreadsheet is specific to this instrument. XL97 (.xls) files with formulas available upon request.
Suggested Observations
Here are the results of the observations suggested in the instructions. These observations were made on February 1, 2019 at the Edmund G. Kline dark sky observation site of the Denver Astronomical Society.
Polaris and the horizon (your latitude): For this one the navigators at sea had a clear advantage over me, and unobstructed view of the horizon. During twilight I used the hand held quadrant described in section 8 to establish point on an artificial horizon in the approximate direction of Polaris. I then measured Polaris at 40.1 cm on scale F of the cross staff. This reads just under 41.11o on the cheat sheet, and calculates out to 41.07o. This value should be equal to the latitude of the viewing loction. The latitude at EGK is 39.65o, a difference of 1.42o, a 3.5% error. Not bad unless you're a navigator at sea in which case you've missed your port by about a hundred miles. I'm pretty sure the error crept in while trying to establish an artificial horizon and then finding this imaginary point in the dark. I could try putting an artificial star out a little way on the horizon with a small flashlight. Pre-1700 I would have used a candle or oil lamp.
Orion's belt. I measured Alnitak to Mintaka as 56.5 cm on scale C, which calculates 3.09o. The separation as measure in Stellarium is 2.74o, a difference of 0.35o, an error of 12.8%. I am more confident of the readings of bigger angle on the wider scales. I'm also hopeful that my measuring technique will improve with practice.
CONSTRUCTION UPDATE - March 5, 2019
I fabricated an adapter to the cross staff so that it could be mounted on a tripod.
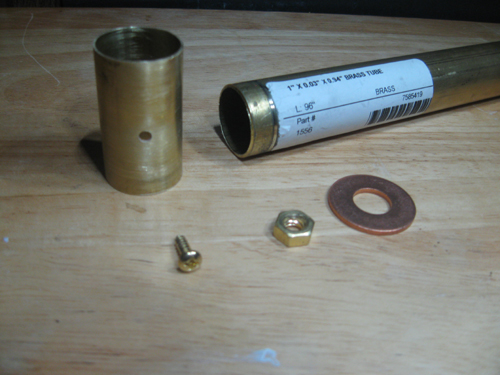
Quite by coincidence, the inside diameter of the brass tubing that I used for the oculus matched the outside diameter of the broomstick handles. I cut off a 2" piece, drilled a setscrew hole and polished it up a bit.
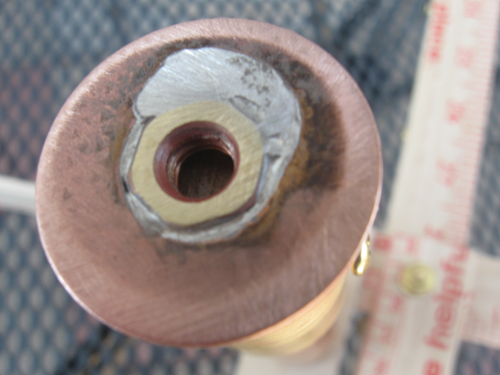
I matched up a 1/4" x 20 tpi (standard photographic tripod thread) brass hex nut with the inside of a copper washer. The outside diameter of the washer was just a bit wider than the brass tubing. I used a copper washer because I could not find a brass washer that matched up properly. I soldered the hex nut into the washer.
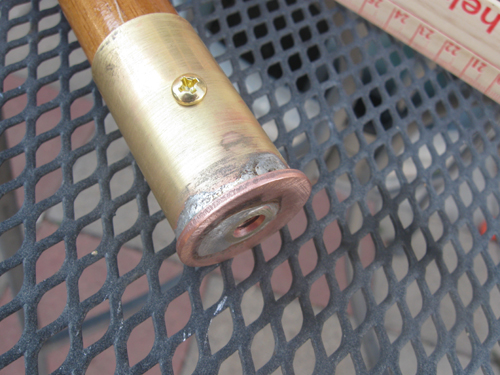
I then soldered the washer to the end of the 2" tube, fit it onto the broomstick handle, drilled a pilot hole and screwed in the set screw.
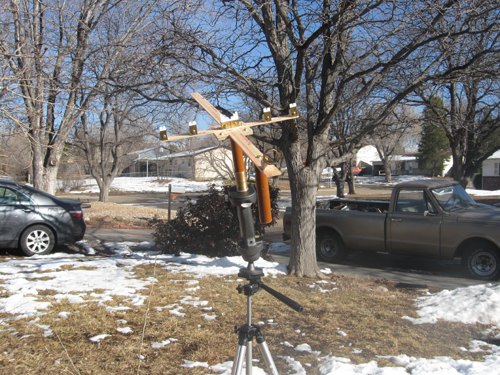
Here's the end result. The cross staff is mounted to a standard photo tripod. This would work fine by itself, but I added a trigger release ball mount for easier aiming. I used this setup on my most recent Sun/Venus angle measurement, and it really helped.
This particular measurement is best made during a very narrow time window when the Sun first breaches the horizon. If you wait too long, the Sun becomes too brilliant to safely make a reading, and Venus quickly extinguishes. With this setup I was able to "pre-align" the cross staff and make minor adjustments as the sunrise approached. Once the sun breached, I was able to quickly fine tune the settings and get an accurate reading.
-- Return
to Astronomy Before the Telescope --
-- Binocrane Home --