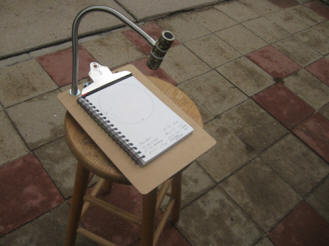
A Red LED Illuminated Clipboard
The beauty of this project is that it's easy, quick,
cheap, and you end up with a dual functional product.
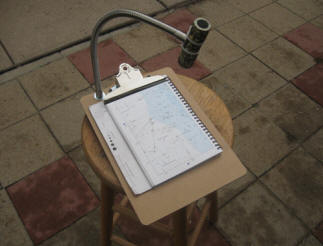
You can use the clipboard for sketching at the eyepiece, or you can use it for a handy illuminated star chart holder.
|
|
MATERIALS
CONSTRUCTION
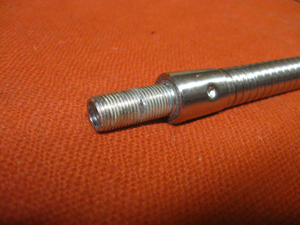
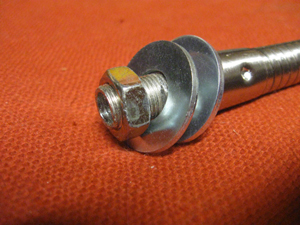
Begin by disassembling the lamp. Make sure that the lamp is not plugged in. I know, stupid, but I had to say it. Remove the wiring that runs up the center of the goose neck, you won't need it. If your lamp has a metal base, there is probably a hex nut securing the goose neck to the base. Loosen the nut to remove the goose neck and SAVE IT. You will need it for final assembly. Shown below are the goose neck end of the lamp that I used, and the end with the hex nut and additional steel washers.
|
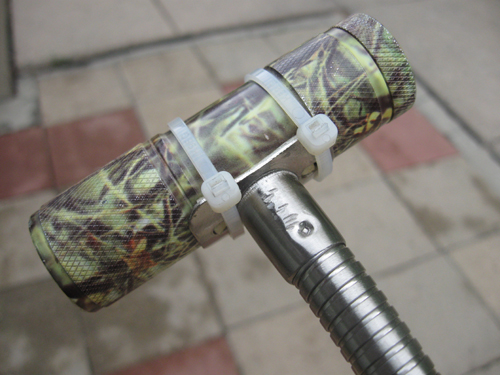
The lamp end of the goose neck will vary according to the style of lamp. I was lucky. The flange that held the lamp fixture onto the goose neck was nearly a perfect fit for the LED flashlight. Shown below is the lamp end of the goose neck with the red LED flashlight secured with zip ties. I used a little patch of foam padding between the flashlight and the flange for a better fit.
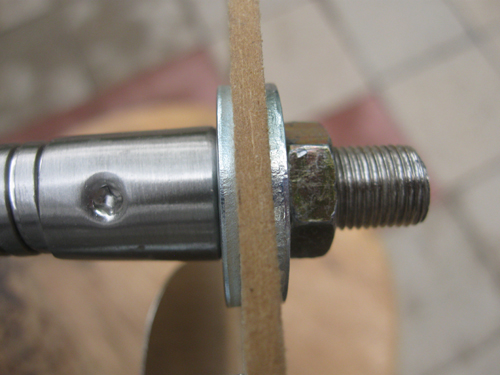
Next drill a hole in one of the upper corners of the clipboard. Make the hole just large enough for the threaded end of the goose neck to pass through. I used a (cheap) digital micrometer to measure the outside diameter of the threaded end. I used this measurement to select the proper drill bit. Before final assembly, give the clipboard a coat or two of sealant for moisture protection. This is my third version using the same goose neck and flashlight assembly. The first one was a clear acrylic clipboard. It looked great, but it didn't take long for the plastic to crack. Next I tried a cheap fiberboard clipboard. That worked fine, but the fiberboard is prone to swelling and breakage if it gets exposed to heavy dew. Below is a cross section photo of the goose neck to clip board assembly.
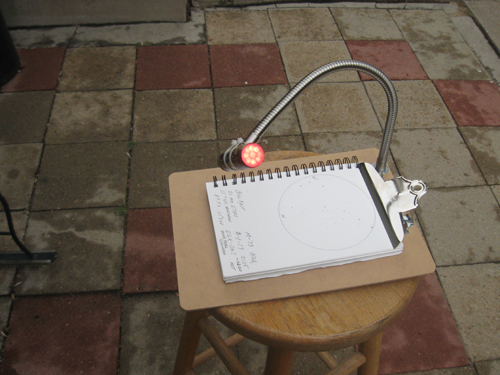
The red light from the LED's is a little harsh and illuminates the sketchpad unevenly. The lamp that I used had a frosted plastic lampshade. I was able to cut a small circle from the shade and attach it to the flashlight lens with a few drops of super glue. This makes a nice diffuser which evens out the illumination. Shown below is the final product with the flashlight twisted around to show the diffuser plate.
There you have it. It took me longer to build this webpage than it did to build the clipboard!
|
PROS |
CONS |
|
|